and another one from Agua Azul in Chiapas, Mexico. Kitsch as kitsch can:
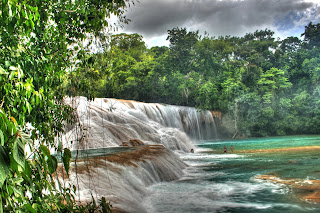
Once one gets over the initial phase of playing with the settings and going to the crazy settings resulting into the images above, one can achieve great results.
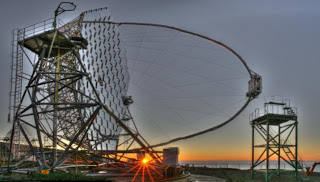
Technically, HDR images are taken using the bracketing mode, which is included in all DLSRs and even some compact cameras. One takes for example 3 images from the same scene but with different exposure levels. Thus, the dynamic range of the image can be increased, which is great for difficult light situations with lots of light and shadow. Using special software like photomatix or photoshop, one can put together the 3 brackets into one HDR photo. Unfortunately, the dynamic range of the resulting image is too large (32 bit depth) to be displayed on a screen or printer. What one usually does is mapping the image down to 8 bit jpgs by using tone mapping algorithms, which keep the local contrast but reduce the total dynamic range of the image. As displayed in above images, these algorithms unfortunately are prone to artifacts like halos, especially if one is not careful and goes over the top.
For HDR time lapse movie, I first follow the general rules of time lapse photography:
- Focus to manual
- Manual white balance (I use SRaw1 on the Canon 50D to be able later to change the white balance when developping the raw images. 7.5 MegaPixel is more than enough for time lapses)
- Manual exposure time and aperture.
Then, I set the camera to bracketing mode +/- 2 EV on the EOS 50D, and to "high speed continuous". In the intervalometer, I use long time exposure, with exposure time at least as long as it takes to take the 3 images from one bracket. (e.g. if the mean exposure time is 1/25 sec, then the underexposed image is 1/100 s and the overexposed 1 sec, so I set the total exposure time on the intervalometer to 2 seconds). With the sraw1 settings, I can take about 3 images in 4 seconds, so I set the interval time such that exposure time + interval time is at least 4 seconds, depending on the subject (for slow clouds 6-10 seconds is fine).
The next step involves waiting for the time lapse series to finish, read a book, listen to music, enjoy the scenery...
When the card is full (16GB is actually quite reasonable for HDR time lapses, 32GB even more), I go home, copy the card to a disk and start photomatix. I will later use the same tone mapping settings for the whole series with the batch processing feature, so I choose first 3 images from one bracket which is "representative" for the whole series, by clicking onto "produce HDR"
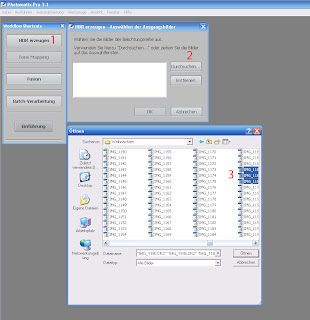
Then twice onto ok until the HDR is created, then tone mapping. Use some decent settings until you like it, then click where I marked it below onto "Save Settings" and save the settings.
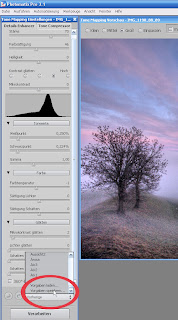
Then close the window and the image.
Click on "batch processing", then on "use detail enhancer settings" and with "load settings" load the settings you saved before.
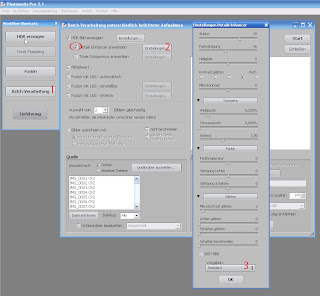
Then click on "choose source folder" and search for the folder you have saved the images. I would save the tonemapped images as 8bit jpgs and choose to remove the HDRs, you won't need them and they need tons of space.
After you finished your settings, click onto run and wait. On my computer this can easily take several hours.
If you are eager to watch your movie, you can use virtual dub to quickly put together the time lapse, but first you need to rename the images such that they are enumbered (e.g. img_001.jpg, img_002.jpg, img_003.jpg etc). For that I use the free program bulk rename utility.
Then start virtual dub, click on file, open video file, choose the first image from your series and "Image sequence" as the file type.
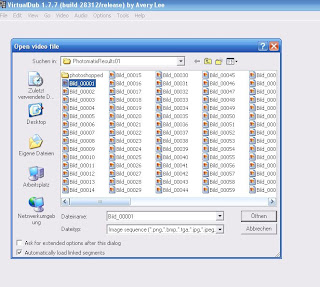
Set the frame rate with Video.. Frame Rate to e.g. 25fps and the Codec with Video...compression to e.g. XviD MPEG-4 Codec. Then resize your images with Video... Filters... Add... Resize to for example 1920x1080. Then save the movie with File... Save As Avi... and wait again a few minutes.
That's it!
An example with mostly HDR time lapses is one from footage I took last summer on holidays in Oregon and California:
www.magictimelapse.ch

Great tutorial! And what a beautyful movie!!!
ReplyDeleteSmall addition to your tutorial:
If you have Photoshop (CS3 + CS4) you can let Photoshop make the movie for you too. Just hit CTRL+O and select the first file in the sequence - before you click "OK", make sure you check the "open as image sequence" box. After that, Photoshop merges all the images into a movie which then can be exported to various formats directly from Photoshop :-) This is also great if you want to do a little post processing - just use Photoshop's adjustment layers etc...
/Henrik
Nice tutorial..
ReplyDeleteOn the white balance you say set to manual but where is manual on a Canon 5d mk2?
thanks
Rissi hammer. Ich versuch das auch mal. Melde mich wieder. Du bist grossartig.
ReplyDeleteThank you it was a fantastic guide, now to create a hdr time lapse is definitely very easy with the help of your tips. Kudos
ReplyDeleteI also know an excellent site where you can find many Video Mapping clips!
ReplyDeleteThe editor alternativephotoshop.com is a Flash app that works on Windows, Mac and Linux. It has the standard tools and some unusual filters.
ReplyDeleteReally a great addition. I have read this marvelous post. Thanks for sharing information about it. I really like that. Thanks so lot for your convene. Time-Lapse Photography
ReplyDeleteAmazing article easy to create make a hdr time lapse thanks a lot
ReplyDeleteThis is a wonderful blog post. Thanks for the information on timelapse video production. Kindly visit us!
ReplyDeleteTimelapse Video Production Company UAE
I find HDR photography fascinating because it allows for capturing a wider range of light and shadow detail.
ReplyDelete